This is going to be pretty abrupt, but I’m just throwing it out into e-ville in case anyone else can use the information.
Q. How do you replace the speed control board on an old stand mixer when you can’t get a direct replacement?
A. Buy the modern equivalent, but only connect to three of the posts.
Modern machines have a capacitor, resistor, and switch build in to the circuit board.
The old machines had separate components. Also, the power line connects to a different location within the unit than on the modern switch board controller.
Therefore, many of the connection points on the modern control boards which would joint to the circuit board are redundant.
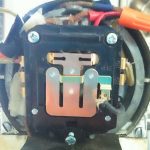
If you examine the old Hobart-era control board, there are two wires soldered to the top (one from the cluster of yellow wires on the left, and the other from the reds), and a black wire soldered to the face right side (which connects to the motor)
Following these principals, the wires can be directly reconnected to the same locations on a new board: top left, top right, face right.
My machine had clearly been dropped by the previous owner and was only operating at one speed: bat-outta-hell fast. It had been hot-wired this way as the correct wiring resulted in a snail’s crawl.
When I connected as described, the unit would cycle through the speeds. BUT on increased speed, the contact point on the left of the horizontal section at the top of the control board would start to spark. There was a feint smell, and some smoke if I continued running the machine for much longer.
When I hot-wired it as the previous owner had done, the unit worked without sparks, but there was no variable speed.
Why, I do not know. If I have the time to tear it apart again and investigate, I’ll update this post.
Maybe it’s a bad capacitor … but who’s to say. Oh. That’d be me! If I get to it.
Given that the unit had been dropped, I think it’s highly likely that something else internally was also damaged.
The bushings are nearly new.

